
What Does Changing a Sink Drain Actually Involve?
Knowing how to change out a drain in a sink is a practical skill that can save Victorian homeowners time, money, and the frustration of a slow or leaking basin. In short, the process involves removing the old drain assembly, cleaning the sink opening, and fitting a new drain with a fresh seal — typically achievable in under an hour with the right tools and a little patience.
Whether your bathroom basin has started draining slowly, your kitchen sink drain is corroded, or you’re upgrading fixtures during a renovation, understanding this process helps you make informed decisions about what you can tackle yourself and when to bring in a licensed plumber.
Common Reasons Victorian Homeowners Replace Sink Drains
Sink drains take a surprising amount of punishment over the years. In Victoria’s older housing stock — think Federation-era homes in regional towns and post-war brick veneer properties — original brass or chrome drains often corrode, crack, or simply wear out over decades of use.
Here are the most common reasons you might need to replace a sink drain:
- Persistent slow draining that can’t be resolved with cleaning or a plunger
- Visible corrosion or rust around the drain flange or body
- Cracked or broken drain body causing leaks under the sink
- Failed or deteriorated putty seal allowing water to seep around the drain
- Upgrading to a new sink or basin during a bathroom or kitchen renovation
- Mismatched drain size after installing a new benchtop or vanity
Identifying the root cause matters. A slow drain caused by a blockage in the waste pipe rather than the drain assembly itself won’t be fixed by a drain replacement — so inspect carefully before purchasing parts.
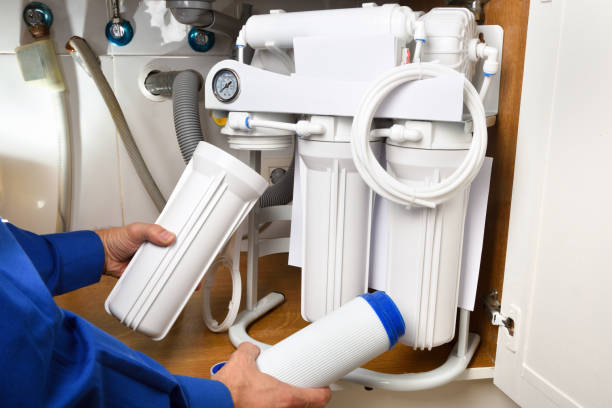
Tools and Materials You’ll Need
Before you start, gather everything you need so you’re not hunting through the shed mid-job with water dripping under the cabinet. Most of these items are available from your local hardware store.
- Replacement sink drain assembly (match the drain hole diameter — typically 38 mm or 44 mm for Australian sinks)
- Plumber’s putty or silicone sealant
- Slip-joint pliers or drain removal tool
- Adjustable spanner
- Bucket and old towels
- Utility knife or putty scraper
- Cleaning cloth and surface cleaner
When buying a replacement drain, check that it complies with AS/NZS 3500, Australia’s national plumbing and drainage standard. Products sold at reputable Australian hardware retailers should meet this requirement, but it’s worth confirming — particularly if you’re sourcing parts online.
How to Change Out a Drain in a Sink: Step-by-Step
Follow these steps carefully and you’ll have a clean, leak-free drain installed without too much hassle.
- Clear out under the sink. Remove everything from the cabinet below and place a bucket under the P-trap to catch any residual water.
- Disconnect the P-trap. Loosen the slip-joint nuts by hand or with pliers and carefully remove the P-trap, emptying water into the bucket.
- Remove the drain locknut. From underneath the sink, use slip-joint pliers or a drain removal tool to unscrew the locknut holding the drain body in place.
- Pull out the old drain. Push up from underneath or pull from the top to remove the old drain flange and body. If it’s stuck due to old putty, gently work it loose with a putty scraper.
- Clean the drain opening thoroughly. Scrape away old putty, silicone, and any residue from both the top and underside of the sink. A clean surface is critical for a watertight seal.
- Apply plumber’s putty or silicone. Roll plumber’s putty into a rope and press it around the underside of the new drain flange, or apply a bead of silicone if your sink material requires it (silicone is preferred for stone or composite basins).
- Insert the new drain. Press the flange firmly into the drain opening from above, then from underneath, slide on the rubber gasket, friction ring, and locknut. Hand-tighten first.
- Tighten the locknut. Use pliers to snug the locknut firmly — don’t overtighten or you risk cracking a ceramic basin.
- Reconnect the P-trap. Reattach the trap, ensuring all slip-joint connections are hand-tight with a quarter-turn extra using pliers.
- Test for leaks. Run water for a full minute and inspect all connections from below. Wipe joints dry first so you can spot any drips clearly.
If you’re working on a kitchen sink with a double bowl or a pop-up waste assembly in a bathroom basin, the process has a few extra steps — but the core principles remain the same. You can find more detail on waste and drain installation services for more complex setups.
Tips to Avoid Common Mistakes
Even experienced DIYers can run into trouble with drain replacements. A few things to keep in mind:
- Don’t use plumber’s putty on acrylic, fibreglass, or stone resin sinks — it can stain. Use silicone instead.
- Always check the drain hole diameter before purchasing — Australian sinks vary, and a mismatched drain will leak regardless of how well it’s installed.
- If the waste pipe behind the wall is involved, that’s licensed plumbing work under Victorian regulations.
For broader renovation projects — like updating your entire bathroom or kitchen plumbing — it’s worth exploring renovation plumbing services to understand what requires a licensed tradesperson in Victoria.
When to Call a Professional
While replacing a sink drain is within reach for a capable DIYer, there are situations where calling a licensed plumber is not just sensible — it’s legally required under Victorian plumbing regulations. Under the Plumbing and Drainage Act 2000 (Vic), any work that connects to or alters the drainage system beyond simple fixture replacement must be performed by a licensed plumber.
You should call a professional if:
- The waste pipe is cracked, corroded, or needs repositioning
- You discover mould, water damage, or structural issues under the sink
- The drain replacement is part of a larger renovation involving new fixtures or relocated plumbing
- You’re unsure about any step and don’t want to risk a leak inside a wall cavity
The team at Blu-Stream Plumbing services homeowners across Victoria, including Shepparton, Cobram, and surrounding regions. If your drain job is more complex than a straightforward swap, get in touch for an honest assessment and a competitive quote.
Conclusion
Understanding how to change out a drain in a sink gives you real confidence as a homeowner — and in many cases, it’s a job you can handle yourself with basic tools and a careful approach. Match your drain to the correct size, use the right sealant for your sink material, and always test thoroughly before calling the job done.
That said, Victorian plumbing regulations exist for good reason. When the work goes beyond the drain assembly itself, or when you’re tackling a full renovation, working with a licensed professional protects your home and ensures compliance. Blu-Stream Plumbing is here to help whenever the job calls for expert hands — contact us today to get started.
Frequently Asked Questions
Can I replace a sink drain myself in Victoria?
Yes, replacing a sink drain assembly — the flange, body, and waste trap — is generally considered minor maintenance work that a competent homeowner can perform. However, any work that involves altering or connecting to the drainage system within the wall or floor must be carried out by a licensed plumber under Victorian law.
What size drain do I need for an Australian sink?
Most Australian kitchen and bathroom sinks use either a 38 mm or 44 mm drain outlet. Always measure your existing drain hole or check the sink manufacturer’s specifications before purchasing a replacement. Using the wrong size will result in a poor seal and potential leaking.
Should I use plumber’s putty or silicone for a sink drain?
It depends on your sink material. Plumber’s putty works well on ceramic, porcelain, and stainless steel sinks. For stone, acrylic, fibreglass, or composite resin basins, use a clear silicone sealant instead — putty can stain or degrade these materials over time.
How long does it take to replace a sink drain?
For a straightforward basin or kitchen sink drain replacement, most homeowners can complete the job in 30 to 60 minutes. More complex setups — such as pop-up waste assemblies, double-bowl kitchen sinks, or older homes with corroded fittings — may take longer and could benefit from professional assistance. For more about what we do, visit our homepage.